Monday, August 19, 2013

Summer Farm Share, Week 9

Well, it’s the last week of the farm share blogs. And what a great week to end it on. We got tons of beautiful looking stuff (please see right).

Aren't those fairytale eggplant so pretty? And we finally got (two measly) tomatoes!!! And BS leaves again, oh shoot. But still, give me at least some tomatoes, and I am a happy camper.

Alas, my vacation to-do list is creeping up on me. So this blog posting will only have one dish in it. But it’s a perfect one to end on. It’s a great way to use lots of vegetables at their peak, all in one meal that is hearty and delicious. Readers, I give you, ratatouille. Or, more fully, Ratatouille over Goat Cheese Polenta. Make it for yourself, your friends, a dinner party full of people. Everyone will love this one.

Ratatouille over Goat Cheese Polenta
Used: Fairy tale eggplant, tomatoes (ok, no I just ate those raw right away), squash, peppers, basil

Ratatouille
4-5 small fairytale eggplant (or other eggplant)
1 small zucchini
1 small yellow squash
1 small red bell pepper
1 small green bell pepper
3 tablespoons olive oil
1 small red onion, chopped fine
¾ cup of ground tomatoes, canned (or if you are lucky, two small ripe tomatoes, pureed)
2 teaspoons minced garlic
3 tablespoons finely chopped fresh parsley leaves
2 tablespoons finely chopped fresh basil leaves
1 tablespoon finely chopped fresh thyme leaves
Salt and Pepper

Polenta
1 cup ground yellow cornmeal
½ a log of goat cheese
3 cups water
Salt and pepper

Start the polenta first, because it can take a while. Heat up the water in a saucepan with high sides (as high as you have). When it is boiling, slowly pour in the polenta (watch out, it sometimes bubbles at you), and turn the heat down to medium low. If it is still spattering, turn it to low. Stir the polenta frequently to keep it from sticking to the bottom. The polenta is done when you can stand a wooden spoon in the middle, and it doesn’t fall over (or, you can just taste it, but don’t burn your tongue!) When it is done, turn the heat off and add salt, pepper, and goat cheese. Stir until incorporated.

While the polenta is cooking, make the ratatouille. Please note, if you don’t have quite enough of one thing, no worries! You can adapt this to whatever you have. I didn’t have enough zucchini and it came out just fine; I added a bit more eggplant. Cut eggplant, zucchini, yellow squash, and bell peppers into 1/2-inch chunks. In a large heavy skillet cook eggplant in 1 tablespoon oil over moderate heat, stirring (and adding a bit of salt and pepper), until tender and transfer to a bowl. In skillet cook zucchini, yellow squash, and onion with salt and pepper to taste in 1 tablespoon oil over moderate heat, stirring, until crisp-tender, 3 to 5 minutes, and transfer to bowl. Cook bell peppers in remaining teaspoon oil in same manner, and when they are done, add the garlic in, wait 10 seconds, and then add back in all the other vegetables. Then stir in tomato purée, garlic, herbs, and salt and pepper to taste. Make sure it tastes good now!

Put the polenta in bowls, and top it with the ratatouille. So delicious, so colorful, and so many vegetables in one meal. Noah didn’t miss the meat and neither will you. This is also a great dish for winter time --- while the veggies aren’t as fresh, it will be oh-so-satisfying to have a heaping bowl of this on a cold day. Let’s not think about those days right now though.

Thank you to everyone who was following my Summer Farm Share adventure this season. As I mentioned before, I have a Fall share too now, but I won’t be holding myself elaborately accountable of everything I make on this blog. I will be posting weekly though, about something new from the farm share that I think you all might like to know.

Until then, keep cooking! See you all in the Fall! 

Wednesday, August 14, 2013

Summer Farm Share, Week 8

Guys, I have to admit, I was kind of disappointed with this week's pickings from the farm share. I mean, it's August right? Doesn't that mean all our favorite summer veggies are here? Tomatoes, eggplant, corn, etc? Well not this week at Siena Farms unfortunately. I hope that they will be coming in abundance next week. But not to worry! I came up with some new ways to use the old (at this point) standbys although it was admittedly one of my tougher weeks . Unfortunately I cannot show you the picture of everything laid out because I had used Noah's phone to take the picture and he's away hiking without the Internet. So, you'll just have to imagine it.

New: Thyme. And brussels sprout plant leaves. Seriously.

Old: Green peppers, onions (4, yay!), potatoes (a yellow kind, called Superior), carrots (so so so many carrots; a gallon sized bag's worth), zucchinis, two green oakleaf lettuces, cucumbers, mesclun mix, and scallions.

Snack 1: Carrot Cake
Used: Carrots

Alright, so carrots. You are getting really old! But I realized that I had been storing these all wrong. If they are in a zip lock bag in the fridge, they can last forever, but if they aren't in a bag, well, they will shrivel up. So since I didn't realize that at the time, I wanted to use up as many carrots as possible, quickly. Therefore, I made carrot cake, of course. I made his for the the blog quite some time ago, but the recipe is from smitten kitchen, and it is really a great one. I suggest you try it even if you don't have an overabundance of carrots. I made this one in a bundt pan which was great for slicing off a piece for breakfasts---I mean snacks.

Meal 1: Onion Thyme and Bacon Flatbread with Salad
Used: All the onions, thyme, mesclun mix

Well, what did you expect? It was Flatbread Friday! But I will say that I've changed my technique on flatbreads that have a lot of cheese on them -- I instead cook one side on the grill, and take it off the grill, leaving the cooked side up. Then I add the toppings onto the cooked side, and return it to the grill, raw side down, and cover it to melt the cheese while the other side cooks. I realized that if I don't do this and instead cook both sides first, the cheese won't melt before the bottom gets too burnt. So if you are choosing to put a lot of cheese on top, go with this modified technique.

I didn't want to do much with the onions besides sautee them a little because they were just so so delicious on their own. The pizza was great with just the onions on it, but would work by adding mushrooms, sausage, or any other number of things as well.

Meal 2: Herbed Summer Squash and Potato Torte and a Salad
Used: Potatoes, Summer Squashes, Thyme, Scallions, one head of oakleaf and mesclun mix

As I headed into the weekend, I wanted to make something special and new with the "old" ingredients, and so I went to epicurious.com and typed in summer squash and potatoes -- sorting through the search results I found this torte, which not only looked delicious, but for which I had every single ingredient already on hand. Score! (this never happens.) I was a little doubtful that this would actually come out like a torte since it really only had some grated parmesean cheese to bring it all together. But, the reviews seemed positive so I went for it. And... perhaps I should have heeded my gut feeling... because this is what happened when I tried to put the torte slice on the plate:

Dang it! It was holding together for a second, but then just fell right apart on the spatula, and all over the floor! I have a few ideas on how to fix this for next time, because it actually tasted good and would be worth making if it actually would stay together. So, here is the recipe, with my notes:

Herbed Summer Squash and Potato Torte

Ingredients

1 bunch green onions, thinly sliced
1 cup grated Parmesan cheese
2 tablespoons all purpose flour
1 tablespoon chopped fresh thyme
1 1/2 teaspoons salt
3/4 teaspoon ground black pepper
2 pounds Yukon Gold potatoes, peeled, cut into 1/8-inch-thick rounds
(use a food processor to make it fast)
12 ounces yellow squash, cut into 1/8-inch-thick rounds
6 teaspoons olive oil

Preparation

Preheat oven to 375°F. Butter two 8-inch-diameter cake pans. Set aside 1/4 cup sliced green onions. Toss remaining green onions, cheese, flour, thyme, salt and pepper in medium bowl to blend.

Layer 1/6 of potatoes in concentric circles in bottom of 1 prepared pan, overlapping slightly. Layer 1/4 of squash in concentric circles atop potatoes. Drizzle with 1 teaspoon oil. Sprinkle with 1/6 of cheese mixture. Repeat with 1/6 of potatoes, then 1/4 of squash and 1 teaspoon oil. Sprinkle with 1/6 of cheese mixture. Top with 1/6 of potatoes. Drizzle with 1 teaspoon oil. Sprinkle with 1/6 of cheese mixture and press gently to flatten (really press -- maybe this will help). Repeat procedure with second cake pan and remaining potatoes, squash, oil, and cheese mixture.

Cover pans with foil. Bake until potatoes are almost tender, about 40 minutes. Remove foil; bake uncovered until tortes begin to brown and potatoes are tender, about 25 minutes longer. 
Cut each torte into wedges. Sprinkle wedges with 1/4 cup green onions (do this -- the garnish actually adds a great flavor); serve.

So the recipe seemed straightforward, if time consuming. I made the torte as instructed (or so I thought), and layered the squash and potatoes, like so (right). I think this may have been  part of the problem. I would go around the outside, and then stuff some in the middle. But that is not really what concentric circles are. I should have started in the middle making a small circle, and overlapping bigger circles until I got to the edge. And next time I will do this. There's a picture of it taken out of the oven -- looks deceivingly fine, right? Oh well. At least it was still tasty!

Meal 4: Cucumber Mint and Avocado Soup (course 1) and Stuffed Peppers (course 2)
Used: Cucumbers, mint, peppers, two brussels sprout leaves, some carrots

I am always on the lookout for new recipes, and I found a really nice one in the New York Times for cucumber soup. Unfortunately, every time I make cucumber soup it doesn't taste much like cucumbers and instead tastes like watery yogurt. This time was no different, EXCEPT one of the commenters on the recipe said that he added half an avocado to his soup (the author suggests cutting them up and serving on toast with the soup) -- and bam! Then it worked. It was a nice and refreshing first course. I didn't have any corn or dill for the garnish, so I just  tried to get fancy with the olive oil garnish, as you'll see in the photograph.

Cucumber Soup

1 pound cucumbers, peeled, halved lengthwise and seeded

2 cups buttermilk (or use 1 1/2 cups plain yogurt plus 1/4 cup water)

1 large garlic clove, peeled and smashed

2 anchovy fillets (optional)
(I used anchovy paste -- this soup definitely needs it I think)

2 small whole scallions, trimmed

1/2 avocado

1/2 jalapeño, seeded, deveined and chopped (did not use, because I am a spice wimp)

1/2 cup packed mixed fresh herbs (like mint, parsley, dill, basil)

1/2 teaspoon sherry or white wine vinegar, more to taste

3/4 teaspoon kosher sea salt, plus more to taste

Extra-virgin olive oil, for serving

Toasted pine nuts, for serving

In the bowl of a blender or food processor, combine cucumber, buttermilk, garlic, anchovy, scallions, jalapeño, fresh herbs, sherry vinegar and salt (and half an avocado). Blend until smooth and adjust seasoning as needed. Distribute soup between 4 bowls and garnish with pine nuts and a drizzle of olive oil. 

And there you have it. Now why am I making two courses for a weeknight dinner, you might ask. Well, because I was making stuffed peppers for a main course, and Noah -- really doesn't like peppers. So I thought I could appease him by making something else as well, to take the focus off the peppers. But it turns out, he actually liked the peppers too, score!

These were kind of a mishmash because I had a base recipe and then tried to stuff as many veggies in there as possible to get rid of them. And from looking through recipes I learned that you can stuff peppers with pretty much anything!

First, I sliced the green peppers in half and scraped out the seeds and insides. Let me tell you something that I learned about green peppers --- they are actually unripe red/yellow/orange peppers! I hope none of you think I'm an idiot, but I had no idea. I thought green were their own variety. Well they aren't. That's why I've only gotten green so far, because they are "unripe."

Going in the oven
Then I cooked up three chicken sausages (squeezed the meat out of the casing into a pan with a tiny bit of olive oil on medium heat), and shredded up 5 carrots and 2 brussels sprout plant leaves and one small onion in the food processor (see left). From now on I will call these BS leaves. I mean, what am I supposed to do with those leaves? They said "use like kale" but they don't really taste like kale. And there were a lot of them! They could easily overpower a dish. So -- shredded up and hidden and things they went.
Anyway, let's continue. In a separate bowl, I added the shredded veggies, cooked sausage, a little bit (1/4 cup) of tomato sauce (just the plain stuff you buy in a can with the other tomatoes), salt, pepper, 1 egg, parsley, thyme, 1/4 cup of breadcrumbs, and a 1/4 cup of mozzerella cheese. I mixed all that stuff up together, and stuffed it into the pepper halfs (overflowing). I drizzled a little more tomato sauce into the bottom of a glass baking dish so it just covered it, and then placed the peppers on top after sprinkling a few more breadcrumbs on the top. I baked them for about 45 minutes at 350 (I waited until the pepper skins looked a little shriveled and cooked). Serve with quinoa, rice, cucumber soup (ok, not together) or whatever you like!

Meal 5: Chicken Fried Rice
Used: Carrots, brussels sprout leaves (still not all of them)

Fried rice is one of my go-to meals. It is relatively easy to make, and hearty in the way that it can fill you up with relatively few ingredients. And I know you can hide things (looking at you BS leaves) in there.

The first thing about fried rice is to, surprise, have rice on hand. This is best if the rice is leftover from last night, but somehow that timing never works out for me. It works with fresh rice too. So when you get home, just put the rice on before you do anything else so it has plenty of time and will be cooked by the time you prepare everything else.  So I chopped up the BS leaves very tiny, and also diced up some carrots and onions. I take a very very large skillet (almost a wok but really not at all because woks are very fancy) and put 2 TBSP of canola oil in there on medium heat. Once it is hot, I quickly add 1 minced garlic clove and a little bit of fresh ginger, also grated or chopped tiny. Then after literally 30 seconds, I add the diced carrots and onions, and let them cook for a few minutes until then are tender (onions will be translucent). Then I added one chopped up chicken breast (just cut it into bite sized pieces), and a few shakes of soy sauce. Then, once the chicken was cooked through (5-7 minutes) I added the chopped BS leaves and let them cook for a minute. Then added a cup of frozen peas and a cooked egg (cooked it up separately by literally spraying the pan with cooking spray, putting it over the heat of the burner, and adding a stirred up egg). Once the peas are thawed, add the cooked rice right on top (see above). Then you are going to add a lot of soy sauce. And a very lot if you have a lot of rice. You want the rice to turn light brown. Stir everything around so it all gets coated with the soy sauce and incorporated, then taste a bit of the rice to see if it has enough flavor. If it does not, add more soy sauce. When it looks and tastes good to you, take it off the heat and serve! You can definitely change up the vegetables added (brocolli, sliced sugar snap peas, whatever you want, it's your dish -- I guarantee you no one would ever think of BS leaves as a first choice, but it worked).
So, that's a wrap! Let's review the rules before we're through. 1. Try everything? Yessiree. 2. Use everything? No way. I still have at least a dozen carrots and most of the BS leaves. Fortunately those carrots keep for a while, and the BS leaves will keep until I figure out what to do with them. I hope.

Until next week, which is, my final week of Farm Share blogs! Hey, a girl has got to go on vacation once in a while, right? But don't worry. The postings will keep on coming. They will just be a little less intensely focused on using up and eating veggies and more on, well, me messing up in the kitchen, and you laughing at me but also learning something.


Monday, August 5, 2013

Summer Farm Share, Week 7

So it's week 7! I have been doing a lot of reflecting this week on how you get "good" at something. Tuesday was my one-year "job-iversary" as Noah likes to call it, and I thought a lot on that day about how different my time at work is now than it was when I started. How comfortable I felt with the work assigned to me, how I actually knew what I was doing, how I felt like I really contributed something to the team, and how I was even able to help a lost patient find their way to their destination. All of these abilities were non-existent a year before on that day. And I was thinking about how cooking is the same way. You just have to practice, practice, practice, make mistakes, and keep learning as much as you can. I used to be a terrible cook. I made Rice Krispie treats that would break your teeth. My family members would cringe if someone informed them that I made a component of the meal. Well no more! While I still have a lot more to learn, I am comfortable in the kitchen and know my way around a recipe (my Rice Krispie treats are often requested now). I just want you to know that you can feel like that too, with just some time and practice. And even if you already know how to do everything on this blog, keep learning elsewhere (but don't stop reading!).

This is all in preparation to say that this week, we are going to tackle some new and semi-difficult things to make. But first, let's see what I got this week in the farm share box:


A few new things: Eggplant! Fresh onions (these things were THE BEST), a green pepper, celery (! i have never seen this ever at a farmer's market in the northeast), and two unripe green tomatoes (seriously?)

And some oldies but goodies: summer squash, potatoes, green oakleaf lettuce, mint, savory, cucumbers, rainbow swiss chard and ... carrots. I am getting a little sick of carrots.

Beet tzatziki -- so pink!
Before we start on this week, I still had some beets to use up from last week. There is this great cafe near my house (incidentally they own the CSA farm and that is where I pick up my veggies every week), and they have something called a mezze bar. It has hummus and muhummara and other kids of dips and things that you can choose from and they'll put them on a platter for you to eat with crackers or pita. One of those mezze dips that I love in particular is the beet tzatziki. Man is that stuff good. But then I thought, why am I paying three dollars for a little scoop of that when I could make it myself? NO reason, so I made it up! So here's what I did. I roasted all the beets (about as much as two large beets or three medium ones), same as always. Then I peeled them and threw them in the food processor, and zipped them up into tiny pieces. Then I mixed them with 1/2 cup of plain greek yogurt, a handful of chopped dill, and salt and pepper. Stirred that around until it was all mixed together and done! The dip was deeeelicious and I have been eating it all week, and admiring its color as well. *Hint: Do not wear white to work if you are bringing this as your mid-day snack.*

Meal 1: Steak, onion, and pepper kebabs with brown rice plus a green oakleaf and cucumber salad with mint cucumber dressing
Used: Cucumbers, oakleaf, mint, onions, summer savory, pepper (booyah!)

We had an awesome dinner guest on the first day -- my lovely sister in law. Said SIL cannot eat gluten. Well I bet you didn't even think about whether or not gluten is in the meal stated above. But there isn't. So put it in your GF arsenal. We have already made kebabs during this summer, week 3, and these are the same deal, but I used a little summer savory in the marinade. But before we move on from the kebabs I just want to say these onions were amazing. Literally the most delicious onions and one of the most delicious vegetables I have ever put in my mouth. You see how they have the long green stems in the picture up above? These are fresh onions. The onions we get at the store with the thin papery skin on them? Those are cured onions (learn something every day!). These fresh ones are so different and so worth picking up if you see them. Especially on the grill they were so sweet and well, just go try them.

Now for the salad dressing. This was a first for me, and not really much of a success I must admit. I forgot one thing which made a big difference -- cucumbers have a really high water content. Therefore, when I put everything to make the dressing in the blender, I added some water, because I knew my blender would not tolerate only solid things in there. However, as soon as it sucked up those cukes the water amount tripled and the dressing was really watery. Also, this didn't make a great match with the oakleaf lettuce as it was too bitter. But I think it would have been good on just sliced cukes, or as a marinade, or on a corn salad.

Cucumber Mint Dressing


1 cup plain greek yogurt
3 small cucumbers, chopped into big chunks
2 handfulls of mint leaves
1 handful of dill
A dash of Worcestershire sauce
Salt and Pepper to taste

Put all of this in the blender (cukes first) and zip it up. You might have a crappy blender that doesn't want to zip this up --- shake it around while it's running (carefully of course) and that should help it along. Here it is. Too thin, but still a pretty shade of green.

Meal 2: Sausages with Fried Green Tomatoes and Stuffed Summer Squash
Used: Summer squash, green tomatoes, swiss chard

What else am I going to make with green tomatoes, right? I mean, sure you can pickle them. But I don't have the proper stuff and let's be honest, no one would eat them but me. So fried green tomatoes it was. Obviously, these are not heart healthy, but they were actually pretty good. And better for you than frying oreos, right?

Fried Green Tomatoes


2 green tomatoes, sliced to 1/4 in thickness
1 cup of cornmeal
1/2 cup of breadcrumbs (not panko)
1 cup flour
1 tsp of smoked paprika
1/2 cup buttermilk
1 egg
Enough canola oil to cover a 1/2 an inch up the side of your deep skillet (or peanut oil if you're hardcore)
Salt

First, sprinkle salt on the tomatoes and let them rest for 10 minutes or so. In the meantime, mix the egg with your buttermilk in a small bowl,  your flour with the paprika and a pinch of salt in another small bowl, and your cornmeal and your breadcrumbs in another small bowl. Line up your bowls so that you have the flour mixture, then the egg mixture, then the cornmeal.

Now you are ready to fry! Add the canola oil to the deep frying pan (1/2 up the side like I said), and heat it up on medium high. To test if it is hot enough, drop in a tiny bit of  cornmeal and see if bubbles form around it immediately, or if it just sinks to the bottom and is sad. Wait until it bubbles with a drop of cornmeal, then it's ready (or if you have a thermometer (not me) the oil should be at 350). Quickly dunk each tomato slice in the flour, then the egg, then the cornmeal bowls, and then put it in the pan. Put as many in as will fit without overlapping. Then just watch for them to turn brown underneath (2 minutes should be pretty good), and then flip to the other side and cook another two minutes (or until bottom side is brown). Then, take them out and lay them on paper towels to absorb excess oil. Sprinkle a little salt on them while they are still wet from the pan.

Don't those unripe tomatoes look tasty now?
Let me say that these were actually good, to my surprise, and Noah-the-tomato-hater actually ate them because "they didn't taste like tomatoes at all." That was probably because of the remoulade sauce I made. Dips make everything better. This is the ultimate pantry sauce meaning, a bunch of crap that is sitting around in your cabinets and or fridge somehow makes something edible. This is what the sauce has: 1 small squirt of mustard, 3 TBSPs of light mayo, a splash of pickle juice, 6 shakes of paprika, and two dashes of tabasco sauce. Even though this sounds totally gross, it is actually based of a recipe for remoulade, so no, I am not playing a trick on you. It works!

I also made stuffed squash with the same exact stuffing I used for the chicken last week, except without the egg, mostly because I forgot to add it. They were still good. Just scoop out the seeds with a spoon (surprisingly easier than it looks), and put in the stuffing. Top with breadcrumbs and roast at 425 for 20 minutes on a cookie sheet, or until they begin to brown on top and on the sides.

Of course, had to get some meat in for Noah... and if you need to, just sautee up a chicken sausage, slice, and add to the plate.

Meal 3: Moussaka
Items used: Eggplant

Ah moussaka. Moussaka (pronounced moo-sah-KAH, not moo-SAH-kah as was once rudely pointed out to me) is one of my absolute favorite dishes of all time. For those of you that don't know, mousakka is a greek/middle eastern dish that is like lasagna, only better (don't tell my Italian fam). It uses eggplant as the layers, along with meat, tomatoes, onions, and cinnamon, which is KEY, all topped with a delicious (albeit scary at first) bechamel sauce.

Turns out, my eggplant was too tiny for a whole moussaka, but if I have an excuse to make moussaka, I am going to make it, so I had to supplement by buying another one at the grocery store. Oh well. Will I regret doing this once eggplant season is fully upon us? Probably.

Anyway, I get my recipe from a great middle eastern cookbook called the New Book of Middle Eastern Food by Claudia Roden. Here is her recipe, with my notes. We will talk more about the bechamel in a minute.

Moussaka

Ingredients:
3 eggplants (about 1 1/2 pounds) peeled and sliced thinly (she doesn't peel. I think it's better if they're peeled).
Brush the eggplant slices generously with olive oil (both sides) and broil or grill them, turning them over once, until lightly browned. (My broiler takes about 4 minutes each but you have to watch them! They can burn up in a second. I rotate the pan around to prevent some of them from browning too fast. See left for a sample of how they should look.) Set aside.

For the meat and tomatoes:
2 onions, thinly sliced or chopped
3 T vegetable oil (canola)
1 1/2 lbs ground lamb or beef (I am sure lamb would be tasty, but I always use ground turkey and it still tastes good)
salt and pepper
2 t cinnamon (she says optional; it's not)
5 large tomatoes, peeled and chopped (Since tomatoes out of season are gross, I use one large can of peeled whole tomatoes, and then chop them up myself. You could used canned diced tomatoes too)
2 t sugar
1/2 t chili-pepper flakes
3 T chopped flat-leaf parsley (Sometimes I don't include this because I don't have it. It still works)

Fry the onions in the oil in a large skillet or saucepan until golden (medium heat with a little canola or olive oil). Add the ground meat and stir, crushing it with a fork and turning it over, until it changes color. Add salt, pepper, cinnamon if using, tomatoes, sugar, and chili flakes if you like. Stir well, and cook until the liquid has almost disappeared, then mix in the parsley.

For the white sauce topping:
4 T butter
4 T flour
2 1/2 c hot milk (skim always works for me, but the fatter the better obviously. i heat it in a pyrex measuring cup in the microwave for 1.5 minutes)
salt and pepper
pinch of grated nutmeg
2 eggs
1/2 c grated cheddar

Prepare a white sauce: (So this is hard at first, but definitely doable. This is the first successful white sauce (bechamel) sauce that I have ever made. Her directions are very good, but I will note pieces to pay attention to to help you along.) Melt the butter in a pan (med-low heat). Add the flour and stir (she must mean whisk. Whisk it) over low heat for a few minutes, until well blended (see right). Add the hot milk a little at a time, stirring vigorously each time, until it boils, taking care not to allow lumps to form (meaning you are whisking it so they don't form). Simmer over low heat, stirring occasionally, until the sauce thickens. Add salt and pepper and a pinch of nutmeg. Beat the eggs lightly in a separate bowl, then beat in a little of the white sauce (a quarter cup or so), then pour back into the pan, beating vigorously (this is called tempering. you are doing this so your eggs get used to the heat from the small bit of sauce and don't scramble when you put them into the whole pot). Do not allow the sauce to boil again. Add the cheese and mix well until melted. 

If you follow these directions exactly I promise that it will work out, and it will thicken up, and you will be amazed. If it doesn't, write me, and we'll figure out what went wrong. This is a great sauce to know how to make because it is a base for many other delicious things (read: mac and cheese). You can do it!

Then you are ready for assembly. Line the bottom of a large baking dish with half of the eggplant slices. Spread the meat on top, and cover with the remaining eggplant slices (I then cover with more of the meat, but you can put it all in the middle if you want). Pour the white sauce all over (you might have extra. You can freeze it!).

And then you'll have delicious moussaka. Did I mention this was a weekend project? Yeah, don't try to make this when you get home. Dinner will be at 10pm.

Bake, uncovered, in a preheated 400 degree Fahrenheit oven for about 45 minutes (40 minutes for me), until golden.

Meal 4: Grilled BBQ Chicken with grilled carrots, potato salad and corn
Items used: Potatoes, celery, carrots

So, I've already blogged about almost everything on this dinner plate before, except grilled chicken. I realize it is a little late in the summer to be talking about how to properly grill a boneless chicken breast, but better late than never. There are lots of misconceptions about grilling chicken, and I want to set some things straight.

1. You do not put your raw chicken onto the grill with the sauce already on it.
2. You do not put chicken on grates that have not been prepped and just pray that it doesn't stick and that it turns out to have beautiful grill marks.
3. That is all. If you follow the directions below your grilled chicken will always be delicious and it will not have burnt or "blackened" sections of carcinogens that you shouldn't be eating anyway, nevermind that those parts taste terrible.

So first. Take your boneless skinless chicken breasts, and season them with salt and pepper. Let them come to room temperature (or close) while you do other things to prepare for dinner. They don't take long to cook.

When you are ready, turn on your grill. Once that grill is heated up, take a paper towel, drizzle some olive oil (or whatever oil) on it and bring that out to the grill along with some tongs. Grasp the towel with the tongs (see below), and brush it over the grates, so that they are oiled. This will prevent the chicken (and all grilled food) from sticking to the grates, and make lovely grill marks. Then, slap the chicken down on the grates (slightly diagonal to the grates to get the best marks). Yes, you are putting the chicken on the grill with nothing more than salt and pepper on it. For now.


Then, after a few minutes (4-5) check the chicken to see if it has grill marks on it. If it looks like the photo below (left side), flip it over. Then, while the other side cooks, add the sauce to the cooked side only. Once the other side is finished cooking, flip the sauce side to the grill, and sauce the remaining side. Repeat the saucing of each side and then grilling each side for 1 minute, so the sauce congeals a bit onto the chicken. Serve with remaining sauce.


You will have beautiful looking chicken, that is tasty and miraculously not burnt to a crisp! The secret is that BBQ sauces have a really high sugar content. If you leave said sugar in the middle of a fire for as long as it takes to make chicken not raw anymore, that sugar will burn, because sugar has a high propensity for burning. I don't know what terrible advertising executive thought up the idea of "marinating" your chicken in BBQ sauce and slapping it on the grill, but he/she has not done anyone any favors. Adding it at the end allows it to caramelize and not burn, because it only spends a few minutes over the fire. Doesn't that look appetizing?

So there we have it. Another week of veggies in my belly, and another week of recipes that will hopefully help you get some into yours.  Let's check the rules before we're done.

Did I try everything? Yes, and it all was quite tasty. Did I use everything? Yes. But man am I sick of carrots.  Have a good week everyone!


Sunday, July 28, 2013

Summer Farm Share, Week 6

Well, I'm halfway done with the farm share. At first I was very sad about this. This has opened up a whole batch of new ideas and recipes for meals, and has really changed my diet because I had never thought of veggies first, before meat (ok, maybe when summer tomatoes are out, but other than that, never). Also, these veggies are really good, and rarely are the ones I buy at the grocery store even close. Sigh.

But, I am not too sad is because...it is not really ending! This adventure has convinced me to buy, for more than the cost of a new wardrobe, the Autumn Farm share from Siena Farms. I hemmed and hawed because it is expensive -- more than I would typically spend on vegetables if I went to the grocery store weekly (it costs more if you buy now rather than six months ahead) -- however, as I have previously mentioned, I don't buy as much of the other things as I normally would (meat, carbs, snacks) because I am trying desperately to eat up all the veggies. And, I think this is a good thing. Here's to another 12 weeks!

So what did we get this week? Many repeats! But that's ok. I expect this will be one of the last weeks for things like summer squash and broccoli, so I made do.

The only new thing: Red potatoes (many more than shown)! ooooo. I didn't even realize potatoes were a summer veggie.

And the rest of the bunch: summer squash, green oakleaf lettuce (two heads), fennel (with fronds), rainbow swiss chard, a million beets (many not pictured), a million carrots, persian cucumbers, green curly kale, broccoli, and fresh garlic.

When I saw the potatoes on the list, I immediately thought, potato salad! Typically I am not the biggest potato salad fan but I have to say I found this killer recipe that makes it delicious and so now every time I have a party or, as it happened, have potatoes, I want to make it.

Meal 1: Grilled Chicken Sausages with fennel and onions, Herbed Potato Salad, and a regular green salad.
Used: Fennel, potatoes, 1 head oakleaf lettuce, cucumbers

So this potato salad is fantastic. What makes it fantastic is that there are a lot of fresh herbs in it, and particularly, there is dill. I love dill, but even if you don't like dill, you may very well like this, as my sister-in-law is not a fan of dill, but this is her favorite potato salad ever! (either that or she is just flattering me and scraping out her plate into the garbage when I'm not looking.)

This recipe is from Bon Appetit, with a few alterations.
Creamy Herbed Potato Salad

3 pounds baby red potatoes
3 tablespoons vinegar (something mild. red wine vinegar is nice -- just don't use balsamic.)
1/4 cup mayonnaise (can be light)
1/2 cup sour cream (light works, but not the best)
1 small onion, chopped into four large chunks (red makes a pretty color)
2 celery stalks, cut into a few large chunks
1/4 cup chopped fresh parsley
1/4 cup chopped fresh basil
1/4 cup chopped fresh dill
1 1/2 teaspoons finely grated lemon peel


Bring potatoes to boil in large pot of water. Reduce heat to medium-low and simmer until potatoes are tender, about 17 minutes. Drain; let stand until cool enough to handle, about 20 minutes.

Let me make a note here. Typically, potatoes are different sizes. Which means, they cook at different speeds. These are done when you are able to push a fork into them pretty easily, but they should still retain some amount of resistance (not be falling apart). Once a potato reaches that stage, pull it out and put it in a colander in the sink. This will happen with the smaller ones and the ones near the bottom first. Keep poking around every five minutes or so until you get the final ones out. This will make it so your potatoes are the right consistency, rather than having half of them right, and half of them mush.

Cut potatoes into 3/4-inch pieces. Place 1 layer of potatoes in large bowl (bigger than you think you'll need); sprinkle with some of vinegar and salt and pepper. Continue layering potatoes with vinegar, salt, and pepper. Whirr the onion and celery in a food processor until they are chopped fine (again, not mush -- you can also obviously chop with a knife but it just takes longer). Add all remaining ingredients (I add the herbs half at a time, to make sure they don't overpower everything. You can taste it and see what you like, but I usually end up using all of them); toss (why do they say this? You will have to stir heartily with a large spoon because it will be heavy. Nothing like tossing believe me). Season with salt and pepper. Can be made 8 hours ahead (this can be made way ahead, like 24 hours). Cover and chill.

Another note. Some of the skins will come off when you cut the potatoes. That's ok! You don't need them all anyway. If only half of them stay on, that is enough to make a pretty color (see above side for some of my cut potatoes). And here it is looking delicious on the plate. For the other elements, I simply sliced up the fennel thinly, with an onion sliced thinly, and sauteed in a pan with olive oil, salt and pepper for a long while on medium low heat so they'd get caramelized. When I get lazy I add a little marsala wine to sweeten it up and make it go faster. Caramelizing onions can be the worst thing for an impatient cook. And the salad was, well, a salad, with a red wine vinaigrette this time. But hey, I told you I was missing my salads last week right? I guess Siena Farms must be reading my blog. :)

Meal 2: Friday Fritatta with a Pickled Beet and Cuke Salad
Used: kale, broccoli, garlic

So Noah has come up with Friday names for my usual Friday suspects. Friday Flatbreads and Friday Frittatas. Hey, sometimes you just want something easy at the end of the workweek, am I right? So, again, we have the fritatta that I made week 2. This time, I minced the garlic, and added it to a hot pan with olive oil, for about thirty seconds before adding up the broccoli which I cut up into bite sized pieces. Then I also added some mushrooms after the broccoli had been cooking for two minutes. Then the kale leaves, chopped up. On top of that I threw some cooked crumbled bacon (just a few slices), and poured the standard eggs and cheese over the top like the last version. It worked well, but I did try to use up some ricotta cheese by adding it in before popping it in the oven. It turned out a little watery, but still tasted good, so that's that. I forgot to take a picture of the frittata, but you've already seen that anyway -- old news.

What I did promise last week was to try to do something else with beets besides roasting them. I have read a lot about beets being so beautiful when sliced thin and raw. Well they may be beautiful, ok they definitely are, particularly the chiogga ones, when sliced that way (see right). But I will say, those chiogga ones are NOT delicious raw. They are pretty bitter, and even when I've roasted them I didn't think they were that great. So I pondered how I could serve these and make them look pretty, and so I finally decided on quick pickling them. Often soaking things in vinegar will remove the bitterness from something, and pickled beets are a thing, right? So I peeled the beets, and sliced them thin, and put them in a shallow bowl with cucumbers sliced up as well, and dumped red wine vinegar over them, so they were almost covered in it. I let them sit for thirty minutes like that (stir around once or twice), and - voila! It worked. They were palatable and beautiful. It really improved the visual aesthetic of the frittata (i.e. they did not really belong on the same plate) so I just photographed the salad. Try this out if you get these kind of beets. It really only takes two beets to make a great salad addition.

Snack 1: Zucchini Bread and Muffins
Used: All of the summer squash/zucchini

I recently read this article authored by what I call "a crank" (i.e. someone who is being cranky, or in today's jargon some might say, a hater) in the Boston Globe about the "stages of the farm share." She described a stage of desperation when you try to force vegetables into desserts because everyone hates you for serving vegetables. She also describes a stage of resignation where all you do is make soup because you can just jam everything together and puree it to get rid of it or freeze it. Let me say that before reading the article, I had already done both of these things. This annoyed me because I had done exactly what she said, pretty much on the same timeline that she said I would. But I resent that because I did not do this out of desperation and hatred for my vegetables! I wanted to try some new stuff and keep things interesting. And I also needed some handheld snacks (i.e. muffins) for going to two outdoor theater events (both cancelled because of the rain. booo). So -- I am here to just inform you that you can use your veggies in desserts and it is perfectly fine as long as it actually works and people like it. Zucchini bread is one of those perfectly acceptable things. And this version is not even that bad for you.

This is my mom's Low-Fat Zucchini Bread recipe. It is really really good, and in fact is the first "dessert" I ever made on my own (I know it's not really a dessert per se, but I couldn't make anything else at that point in my cooking career, so this is what I served.) This recipe makes two loaves, or one loaf and twelve muffins of it, which I chose to make instead for easy transport (and you can freeze it easily, so I did that with the loaf) - my mom doesn't mess around with quantities. If you are going to make something, you might as well make extra. This is how she has 35 varieties of cookies ready to serve at Christmas time. So, transcribed exactly as my mom wrote it for me, with my notes:

Zucchini Bread (low-fat)

3 beaten eggs
2 c sugar
3 t vanilla
1/2 c. yogurt (don't use greek -- use regular plain or vanilla)
1/2 c. canola oil
3 c flour
1 t salt
3 c grated zucchini  or summer squash (3 cups worth AFTER squeezing all the water out of it, as mentioned previously, put into a dish towel, twist up, and squeeze with all your might over the sink until you can't anymore; if you measure this before it won't be enough zucchini).
1 t baking soda
1/2 t baking powder
3 t cinnamon


Preheat oven to 350. Beat eggs, add sugar and beat until pale yellow, add vanilla oil and yogurt and beat until thoroughly mixed. Mix together all dry ingredients [the rest will be in my writing. hers is too confusing :)](in separate bowl), and then add half of the dry ingredients to the wet, mix it around, then add half zucchini, then mix it around. Then repeat and make sure everything is mixed (nothing dry is still around). Then stop stirring and pour into two greased (sprayed with pam) loaf pans or muffin pans as you see fit. I almost forgot to take a picture. Here they are going in the oven, and after they've come out. They usually are a little darker once done but I used greek yogurt (don't!) and yellow squash this time, which made a difference. These will cook for about an hour for loaves, 20 minutes for muffins. Use a toothpick and when it comes out clean or with just a few crumbs (no raw batter) take them out. You will need to cool in the pans for a few minutes before trying to take them out, or they will get all stuck in there and it is not fun.


Meal 3: Chilled Carrot Soup
Used: All of my carrots (thank goodness!), garlic

So, as I said, I also made a soup. I continually get a lot of carrots and I honestly just don't know how to eat them all because I am not a huge fan of carrots raw. I asked my brother what I should do and he said to make a soup. I said it was too hot for that. He said to make a cold soup. Smart aleck. But I took his advice. This soup is really easy to make, as are many soups, but what makes it especially delicious is the home made vegetable stock. So let's take a moment to talk about stock.

You are dutifully making lots of vegetables. You often chop onions, carrots, celery, parsley -- almost daily. When you do, you make a lot of scraps (peels, stems, ends) which go in the garbage. This was me until a year ago, when I got a freezer that was larger than a shoebox. Now those scraps from all those veggies go into a gallon ziplock bag in the freezer, and when that bag gets full, I make stock. And that's what I did for this soup, and what you can do, too, with very little effort.

Get a large pot with big sides. The biggest pot you own (within reason), and dump in freezer scraps.  Fill water until it is 2 inches from the top. Set on stove, turn heat up. Bring to a boil. Once boiling, turn the heat down and leave it simmering (small bubbles rolling). Leave it there for 2 hours or until the water level has shrunk down about 1.5 to 2 inches. Drain the scraps out of the stock with a colander, and then add your salt to your taste (it will taste pretty bland at first but the salt will help it really shine). Cool it and then you can pop it in the fridge or in the freezer in plastic containers. I even put it in an ice cube tray and then put all the ice cubes in a bag for the next time 1 need just a tablespoon or two of stock for a recipe. It really is super easy and it will be way better than anything you buy in the store.

Now, here's how to make a great cold carrot soup for summer, with that stock.

Chilled Carrot Soup with Lime and Cumin

2 tablespoons olive oil
2 pounds carrots, peeled, chopped (about 5 cups)
2 large leeks (white and pale green parts only), chopped (about 2 cups)
1 tablespoon chopped garlic
3 1/2 teaspoons ground cumin
1/2 teaspoon dried crushed red pepper
6 1/2 cups (plus more for thinning) of vegetable stock/broth
2 tablespoons fresh lime juice
8 tablespoons sour cream  and 2 teaspoons grated lime zest for garnish

Heat oil in heavy large pot over medium-high heat. 
Add carrots and leeks; sauté until leeks begin to soften but not brown, about 5 minutes. Add garlic; sauté 1 minute. Add cumin and crushed red pepper; sauté 30 seconds longer. Add 6 1/2 cups stock. Bring to boil. Reduce heat and simmer uncovered until vegetables are very tender, about 35 minutes. Working in batches, puree soup in blender until smooth. Transfer soup to large bowl. Cool. Cover soup and refrigerate until cold, at least 4 hours or overnight. Stir lime juice into soup. Thin soup with more broth, if desired. Season with salt and pepper. Ladle into 4 bowls. Spoon 1/2 tablespoon sour cream atop each serving. Sprinkle with lime peel.


This was really nice and fresh -- this is a great light summer dinner for a hot day. It is light though. I served it with bread, and just be warned, Noah only ate this as a whole meal because we had gone out to a buffet brunch that afternoon. But as a starter or a lunch, it's perfect.

Meal 4: Swiss Chard and Ricotta Stuffed Chicken with Roasted Beets and Corn
Used: Some beets, rainbow swiss chard

This last and final meal was a big deal for me and I'll tell you why. I FINALLY POUNDED CHICKEN CORRECTLY. Do you know how many recipes say "pound meat to 1/4 inch thickness" and then continue on with the recipe like it's not a big deal? Well let me tell you, it is a big deal. I have one of those mallet things, with the spiky and and the flat end that you're supposed to pound meat with, but every time I did it, I massacred the chicken, hacking it to pieces, with bits flying everywhere, and not really flattening it out at all, just denting it all over. Then, I finally figured out the two secrets. First of all, you use the flat end for chicken, not the one with pointy pyramid spikes. But second, and perhaps of even more importance, you need to put the chicken inside a large piece of plastic wrap that has been folded over, and then pound on top of that. And it worked. And I even found a new way to stuff chicken. Here is your tutorial:

Step 1: Chicken breast in plastic wrap (see left). See how much space the chicken has to stretch out and move, but yet is somewhat secure because the plastic wrap is folded over around it. This is what you want before you start pounding. Then, use the flat side, and pound evenly around the chicken breast and it will magically flatten without spreading potential salmonella around your kitchen (see right). Amazing!

Step two, add filling to the center of the pounded out chicken breast. I made this filling out of sauteed swiss chard (cut up the stems small and sauteed them first, and added the leaves after until they were wilted. Then flipped them out onto a cutting board, chopped them fine and squeezed it out of all the water I could), an egg, 1/2 cup of ricotta cheese, 1/8 cup of grated  parmesan cheese, basil, and salt and pepper (see left). Then fold ends over each other (see right).

Now, here's the trick. You want these to bake in the oven and be crispy, but you also need them to stick together. This is by far the best method I have learned so far. get a shallow pan (brownie pan, glass lasagna dish, etc.) and spray the bottom with Pam so the chicken won't stick. Take these bad boys you have folded, and hold onto the seam. dip them seam side up in one egg beaten up with just a little bit of milk in it, and then into some panko bread crumbs, but only the side on which the seam is NOT on, so you can hold the seam. Then flip it over and put it into the pan, seam side down (see left; you will also see that I got sloppy as things went on [top to bottom] because my hands were  a mess and I did not pour out enough breadcrumbs so I just had to make do). You may not believe this, but the meat will seal itself together while it's cooking, thus creating a perfect pocket for your stuffing, no hidden toothpicks required. So the chicken turned out great. Unfortunately, I was also in a hurry that night because I was making hand pies for dessert out of a massive amount of cherries Noah bought, but which I am allergic to if raw. I wasn't going to miss out on eating those babies, so I had to find some way to cook them. Thus, alas, the final dinner picture was forgotten. But you can see the cooked chicken (right).

So, another week of veggies gone by! Let's finish up with the rules. Try everything? Yes! Use everything? No. I still have some beets left over but Siena Farms says those will keep for a while, so I will use the rest next week. Plus I need that time to think of something else I could do with beets. Hope these recipes help your week get off to a great start. Until next time!

Saturday, July 20, 2013

Summer Farm Share, Week 5

Wowee!
Hope you all are having a lovely week. My week was very full of activities, with lots of firsts-- from going sailing for the first time, to making cucumber syrup for the first time! This week in the kitchen also had another first – a bad one--which we will explore a bit later. Please, don’t forget, I am documenting all of my screw ups for you so that you won’t make the same mistakes…and you are heeding those warnings, right? Otherwise I am just publicly embarrassing myself for no good reason.

So, this week we have some great stuff. This week was also the first week with NO salad greens. So weird! I actually kind of miss them. Apparently they are almost past season so I probably can’t expect much more.

This week we had a rainbow of beauties (just look at that picture over there)!

Newbies: Basil! Mint! Hakeuri Turnips! (?) Fresh Garlic! Half-grown broccoli? And a million mini Persian cucumbers!
Oldies: Summer squashes, fennel, rainbow chard, and a billion carrots!

Drink 1: Iced Tea with Mint
Used: Mint (obviously)
The first thing I did is what I always do when I have fresh mint, and that is, to make iced tea. Mint really gives iced tea that summery zing that you want. It is so simple to make, too! But as you may or may not already know, I am a tea snob. I will not stand for using lipton tea bags filled with leftover tea bits -- you must use loose leaf. It will make the flavor so much better. I am partial to flavored black teas, and I used a peach black tea for this.

Here's what you do. Fill your tea kettle with water as high as you can (most have a fill line). Set that on the stove on high to heat up. Meanwhile, get a large bowl -- one with a spout on it is ideal since you'll be pouring liquid out of here later-- and add 1/4 cup of sugar (you can add more later if this isn't sweet enough for you) to the bottom, along with several sprigs of mint, and your tea, in a tea ball (pictured here) so you can remove it when it is done steeping. Once the water is steaming in the kettle, pour all that water over everything in the bowl. Let it sit for 4-5 minutes (look at your tea's instructions and usually it will give you the ideal "steeping time" but 4 minutes is typically a good general rule). After this, take the tea ball out of the water, and the mint sprigs out, and stir everything around. Add six ice cubes. Taste, and add more sugar if needed. Add more ice until the tea is cool, and add it to a nice pitcher with 2-3 new fresh sprigs of mint. Then, pour into glasses and enjoy! P.S. If you are going to store this overnight in the fridge, take those mint sprigs out, and replace when ready to drink the next day. If you leave it in too long, the drink will get bitter.


While we are on the subject of drinks, let's turn our attention to cucumbers. As you can see from the picture of this week's haul, we had an overabundance of them, and, although I like a cucumber in my salad as much as the next person, we didn't even get lettuce this week, so I had to think outside the box. After a bit of thinking I remembered that Noah had this great mock-tail in San Francisco that was cucumber based, which I quickly co-opted for my own drink after tasting it. So, I decided to make a cucumber flavored simple syrup to put with seltzer, lime, and mint to make a refreshing beverage.

Drink 2: Cucumber Spritzer
Used: Some Cucumbers, Mint

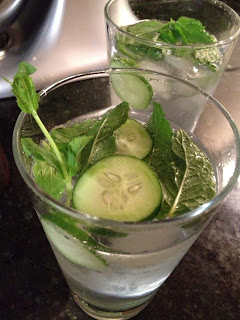
They don't call it simple syrup for nothing. Put one cup of water and one cup of sugar in a saucepan and stir it. Heat on medium until sugar dissolves. Ta dah! Simple syrup. To make cucumber simple syrup, just take the pan off the heat once the sugar is dissolved, and throw in your sliced up cucumbers, stir it around, and let them sit in there until the syrup is cooled (takes about an hour or so). Then, just strain out the cucumbers and you're done! To make the spritzer, just put mint at the bottom of the glass, with a few cucumber slices. Fill it with ice (this will help the mint and cucumber to stay on the sides of the glass and look pretty, unlike my picture. I only had a few ice cubes since I used them all up on the iced tea), and pour some seltzer about 3/4 of the way up the glass. Then add a bit of syrup to your tastes (remember, it is pretty sweet!). Thanks Taj San Fran for the idea!

Snack 1: Half Sour Pickles
Used: Cucumbers, fresh garlic.

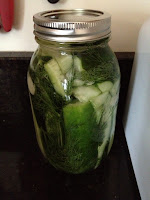
Ok, so I did eventually have to make some food. But I was still stuck on the cukes. Then I said, well duh, I will make pickles! Now, let me just say, I have made refrigerator pickles before -- half sours are my favorite. But what I seemed to forget since the last time I made them was why exactly they were called refrigerator pickles. Was it that you let them sit out on the counter until they reach the proper curing stage and then put them in the fridge to preserve that state? Or do you keep them in the fridge the whole time and just wait a few days until they have cured enough and then eat them up quickly? I looked at the (not great) recipe. I couldn't tell. So, I left it out on the counter. WRONG ANSWER. After stuffing the jar tight with well washed cukes, a lot of the fresh garlic, fresh dill (see left), and then filling it to the brim so it covered everything with very salty water from the tap, I should have put it in the refrigerator. But I did not. And let me tell you, the result was really gross. I couldn't even take a picture for you because it exploded. Ugh. It fermented and built up pressure, and the pickles turned brown and, it just was not a fun time at the sink after opening that lid and shooting pickle juice everywhere. Disaster. It's funny how clearly at that moment I recalled that the first time I made pickles I definitely kept them in the fridge the whole time. So if you do this (and it really is cool to make your own) just keep them in the fridge. Unless you really know how to properly pickle with sanitized jars, etc. If you do, please buy me a canning set and help me learn. :)

Sadly this was not the only disaster of the week. And at the risk of seeming completely incompetent in the kitchen, I am going to just get all the bad stuff out now, and then slowly build back up your confidence in me.

Meal #1 Grilled Flatbread with Half Grown Broccoli, Sausage, and Fennel, and a Summer Squash Salad
Used: Fennel, half grown broccoli, summer squash and garlic

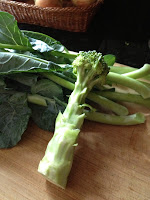
So, I've made a grilled pizza before, week 1. This was just a variation on the toppings.The weird looking half-grown broccoli is on the left. I peeled the stem and sliced it thin, and sauteed these with the fennel, also sliced thinly. After a few minutes, when they were starting to brown up a bit, I added the chopped up broccoli leaves, and the turnip leaves, (on Siena Farms' suggestion) and a bit of chicken broth to soften everything up (1 ice cube's worth). Having cooked these toppings I prepped the dough, and then while Noah was out grilling it, I turned to the salad.

Let me say before I get into this, that this salad is really delicious. Even though this story will probably never make you want to eat it, it actually is good and a nice way to get away from your same old leafy salads.

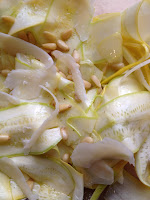
Shaved Zucchini/Squash Salad with Parmesean and Pine Nuts (via Bon Appetit)

1/3 cup extra-virgin olive oil

2 tablespoons fresh lemon juice

1 teaspoon coarse kosher salt

1/2 teaspoon freshly ground black pepper

1/4 teaspoon dried crushed red pepper

2 pounds medium zucchini, trimmed

1/2 cup coarsely chopped fresh basil

1/4 cup pine nuts, toasted

Small wedge of Parmesan cheese

Whisk oil, lemon juice, 1 teaspoon coarse salt, 1/2 teaspoon black pepper, and crushed red pepper in small bowl to blend. Set dressing aside. Easy enough! Just whisk well.

Using vegetable peeler or V-slicer/mandoline and working from top to bottom of each zucchini, slice zucchini into ribbons (about 1/16 inch thick). Place ribbons in large bowl. Add basil and nuts, then dressing; toss to coat. Don't pour the dressing on the squash until just before you're ready to eat.

Season to taste with salt and pepper. Using vegetable peeler, shave strips from Parmesan wedge over salad.

So I have this mandoline. I bought it for myself because I think mandolines are very useful. They basically can slice up your veggies very thinly and in cool shapes, and sometimes, thin veggies really matter, like in this recipe. If you had big chunks that I cut with my knife trying to get the same thickness with every slice using my own eye, it just wouldn't taste the same. I used the mandoline for the shredded carrots and cucumbers in those lettuce cups in week 2, because I wanted them to look good. For this salad, there really is no other possible way to get the squash cut so thinly and "ribbonly" than with a mandoline. I know they suggest a vegetable peeler as an alternative, but it is just not the same. There are two problems with the mandoline though: 1) the slicing blade is very sharp (which makes a good mandoline) and 2) using the finger guard makes you waste a lot of your vegetable because you can't slide the finger guard close enough to the blade, so you end up having to throw away the thick part that can't be cut any further.

So, attempting to fix problem 2 without heeding problem 1, as is per usual for my mandoline use, I left the finger guard in the box and proceeded to slice the squash sliding it over the blade using my bare fingers, so I could get the whole squash closer to the blade. Have I done this before? Yes. Will I do it again? NEVER. What did I do? The squash got thinner and thinner and I even though I was paying attention, I obviously was not aware of the position of each of my fingers and ZIP! sliced the tip of my finger. It was terrrrrrible. It hurt really really bad because it is not just a normal cut -- it is a very sharp blade and so it is very hard to make it stop bleeding and it was considerably deep. (Hopefully you are not barfing at this point because I pretty much was). This is the first time I have ever cut myself in the kitchen (burns yes, but not cuts) and it was a doozy. So let me say to you, as your very honest chef at this point, USE THE FINGER GUARD. Who cares how much of your vegetable you have to throw away --- it is just not worth it.

After I recovered and got bandaged up (thanks Noah) I started over with the finger guard. The salad came out fine but I didn't have much of an appetite after that. And as you can see I forgot the basil because my head was elsewhere. But it is still a lovely dish and a great way to use squash. I wish I could recommend it without this story, but I promised to tell you my mistakes, so there you have it. Sigh.

Thankfully, the rest of the week was more successful.

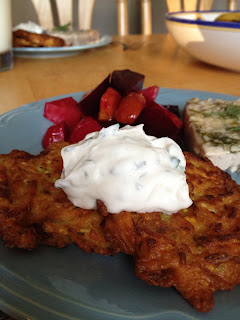
Meal #2: Swordfish steak with Roasted Beets and Carrot-Squash Fritters with Mint Yogurt Sauce
Used: Beets, carrots, remaining squash, mint, garlic

This meal was a great one. I prepared the swordfish in a foil packet like I did with this Salmon recipe a while back -- just flavor the fish with dill, lemon, garlic, salt, pepper, and oil, put in a foil packet, and cook 15-20 minutes in the oven. The beets, same old roasting as we've been talking about. I have to get some new preparations for those, I know. Next week I'll work on that.

But these Carrot Squash fritters were new, and delicious, and pretty foolproof, since this was the first time I made fritters. I thought of making fritters because sometimes people put zucchini in their latkes and I thought, I bet people put carrots in them too. So I search zucchini carrot fritters, and the New York Times gave me "Zucchini and Carrot Fritters with Mint-Yogurt Dip." Perfect! Because I had mint too, and I always a big jug of plain yogurt in my fridge. So I got to work. Here's the recipe, courtesy of the New York Times Dining Section with my notes embedded:

Carrot Zucchini Fritters with Mint Yogurt Dip

1 cup all-purpose flour, more as needed
1 teaspoon baking powder
1 teaspoon coriander (can omit, I did).
3/4 teaspoon kosher salt, more for serving
1 cup milk, more as needed
1 large egg
1/4 teaspoon grated lemon zest (cut the zest up, so you won't get a big string of it when you bite into one)
1/4 teaspoon pepper
2 large carrots, grated (about 1 1/2 cups)
1 large zucchini, grated (about 2 cups)
2 scallions, finely chopped (I omitted because I didn't have, but I bet they would make them taste even better)
1 garlic clove, finely chopped
1/2 cup plain yogurt
1 tablespoon chopped mint (I put twice as much and I think it tasted better for it.)
1 tablespoon extra virgin olive oil
Olive oil, for frying.

1. To make the batter for the fritters: in a large bowl, whisk together the flour, baking powder, coriander and 1/2 teaspoon salt. In a separate large bowl, whisk together the milk, egg, lemon zest and pepper.

2. Pour dry ingredients into wet; whisk until just blended (do not overmix). Batter should be slightly thicker than cream. If it’s too thick, add some milk; if it’s too thin, sprinkle with additional flour (I had to add some additional flour, but listen to what they say -- you don't want it to look like a cake batter or anything, just some thick milk, see right.). Stir in the carrots, zucchini and scallions. Allow to rest for 30 minutes (crucial to getting them to hold together).

3. To make the yogurt dip: using a mortar and pestle or the back of a knife (or a garlic press), mash together the garlic and 1/4 teaspoon salt. In a small bowl, whisk together the garlic paste, yogurt, mint and 1 tablespoon extra virgin oil. Cover and refrigerate until ready to use.

Top, just flipped. Bottom, just went in.
4. Fill a wide saucepan (I used skillet with high sides, which might be what this means but I think saucepan is misleading) with 1 inch of olive oil (mine was about half an inch and worked fine -- if you are scared of using a lot of oil like I am, this recipe is still for you); heat until the temperature registers 375 degrees on a deep-fry thermometer (or until a small drip of batter browns immediately) (I used that test in parenthesis because I certainly don't have a deep-fry thermometer!). Line a cookie sheet with paper towels. Working in batches, drop battered vegetables by the tablespoon into the oil, being sure not to overcrowd the pan. Fry, turning occasionally, until golden all over, about 3 to 4 minutes. Use a slotted spoon to transfer fritters to the cookie sheet to drain. Transfer fritters to a platter or plate; sprinkle with salt and serve with yogurt dip.

Yield: 3 dozen fritters (I made just over 2 dozen, but I tend to have a heavy hand, so my fritters were big).

Don't they look delicious? And the best part is if you make too many for you and your significant other or whoever else is at dinner that night, you can just freeze them and re-heat in an oven or toaster oven, and you can enjoy the leftovers whenever you want!

Hopefully this meal has convinced you that I am not incompetent in the kitchen and that I am capable of teaching you something worthwhile in this blog :).


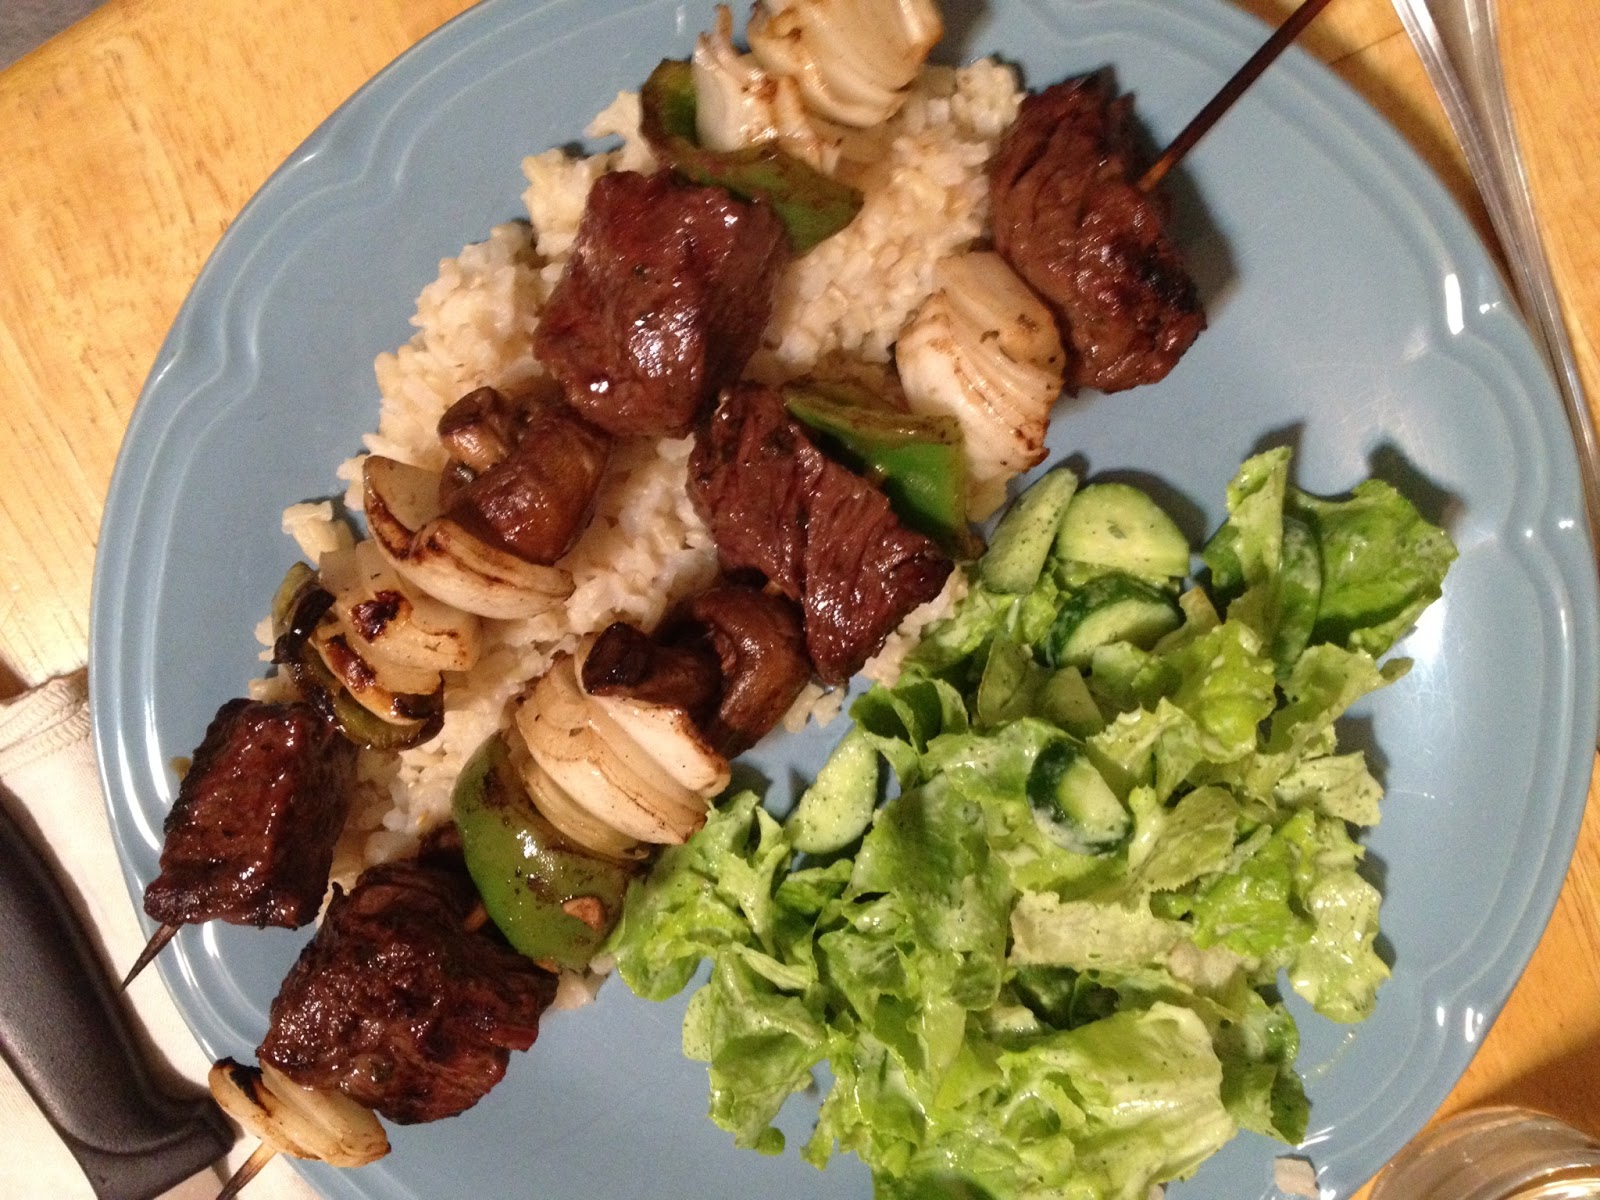
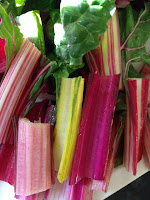
Meal # 3: Flank steak with a Basil Chimichurri, Grilled Carrots and Turnips, and Sauteed Swiss Chard
Used: Basil, garlic, carrots, hakeuri turnips, and rainbow Swiss chard.

For some reason, I always think flank steak is a great summer meal, even though I have never made it before in my life. Why haven't I? Because my grocery store doesn't carry it. At least, I thought they didn't until I asked the man at the meat counter and he said he thought there was one in the organic meats section. Let me take a short aside here -- one of the other benefits of having this farm share is that my weekly grocery bill goes way down because I don't have to buy veggies, but also because I am just naturally eating less meat because I have so many veggies to use up.Which means I can get really good quality meat. So even though this tiny organic flank steak cost like 16 dollars which is normally crazy to me, I bought it because I knew it was better for me and I could actually afford it since basically all I bought this week was a piece of swordfish and a piece of steak among a few other pantry items. It is this fact above all that is making me want to get the Fall farm share as well. We'll see.

So anyway, I got that flank steak. I marinated it in (surprise, right?) a balsamic vinaigrette (hey, this is very common for flank steak --- I do know how to make other marinades!), and also tossed the carrots (washed, but not peeled) and turnips (halved if large) into some as well. I let the steak sit in it for an hour but the veggies only about 10 minutes. Then I made the foil packet of veggies I made in Week 2 for the grill, and tossed it on medium high heat. Once I flipped that over after 10 minutes I realized that was a terrible idea because the vinaigrette was leaking out and causing some pretty huge flames, so I turned it back over, and opened the packet, and just stirred the veggies around so they'd get cooked on all sides. That worked fine. I sauteed the swiss chard on the stove the same way I always sautee greens -- a little oil, then garlic for a minute, then add the chard, and toss it around until it cooks down. Then add salt, pepper, and some red chili flakes if you are into that heat (not like I am but I do like a little zing). Can we all just take a moment to acknowledge how pretty this rainbow chard is though? Look at those stems!

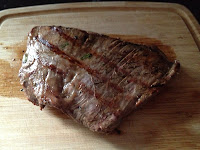
So when the veggies were almost done, I prepped a spot on the grill for the steak. The good thing about flank steak is that it cooks pretty quickly. I took a paper towel with a bit of olive oil on it, and quickly wiped it over the grates (be careful, obviously it is hot, and if you drip any oil -- your paper towel should not be dripping!-- it will cause a flame to come up and burn you so use tongs to hold it just in case) in order to create a good sear. Then I patted the steak dry, seasoned with salt and pepper, and plopped it town on the grates. After a minute I put the cover down, then after five minutes or so, checked for grill marks on the bottom and when I saw them, flipped it over. I wanted this to be pink in the middle, but not raw, and I used the pressing test, which is flawed but works ok, especially for meat that is ok if it is a little under or over done. This is called the hand test. When you press the meat (you can use a utensil and not your bare finger) it is not done if it feels like section of palm under your thumb does when your hand is relaxed. If it is squishy like this it is not ready. So cook it some more. Mine was done in about 15 minutes. Keep the cover down as much as you can to speed along the cooking. Once it is done, pull it off and let it rest on the counter for 10 minutes. At least 5! It needs it, or all your juiciness will disappear. Also you must cut this kind of steak thinly, and as always, against the grain. In the picture above, the grill marks are going against the grain. You see below, those little lines in the meat's "skin", how they are perpendicular to the grill marks? That's what you want. For this steak, slice along the grill marks (your marks will be different, but look at the meat before making that first cut!)

Finally the Basil Chimichurri. Let me say I really have no idea what chimichurri really is because I don't think I've ever had a true one. But I basically know it is a bunch of fresh herbs and garlic in oil, kind of like pesto without the cheese and nuts. So that's what I made. I put a clove of garlic, chopped into three big pieces, into the food processor along with all the rest of the basil I had. I turned it on until it was chopped finely, added salt and pepper, and then drizzled in olive oil while the thing was running. Then I scooped it all out, and added more oil to make it spreadable on the meat. Makes that steak look snazzy doesn't it? And it was a easy but nice and fresh sauce to pair with the steak.

So there you have it. Another week of vegetables, of creativity, and of mistakes which will hopefully never be repeated.
Rule 1: Try everything? Yes, complete success, even the greens of the turnips!
Rule 2: Use everything? I still had some carrots left over, and by this time, they've gone kind of rubbery, so I put them in my stock bag in the freezer. To be discussed next week!

Until then, have a wonderful time in your kitchen, at farmer's markets, and a great time generally enjoying the summer!